


Thursday, September 30, 2010
Tuesday, September 28, 2010

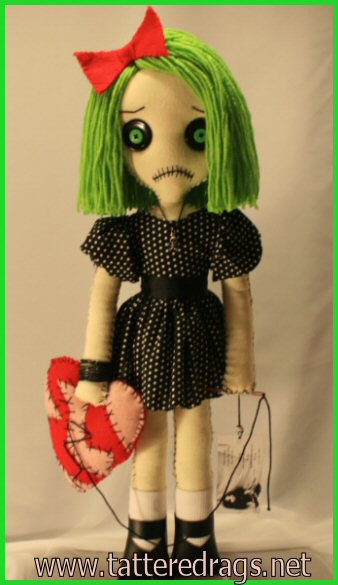
Doll Giveaway...
Monday, September 27, 2010
18" Tall Vintage Movie Monsters Halloween Tree

I created this tree from a wire sculpture underneath and garland outside and hand-sculpted most of the ornaments or built them from scratch. Only the spiders were bought but altered to suit me and I added a spiderweb ribbon tab to hang them from and a tangled little piece of webbing rests under each spider as though he has begun spinning a web there. It's difficult to tell from the pictures but this tree is lit with 50 purple lights that really shine in person. Not so much in this photo though, hard to see but I have more pictures on the listing for further viewing. The photos are of black and white movie monsters like Dracula, Frankenstein, his bride, even a haunted house. It is available in my Etsy shop now here at: http://www.etsy.com/listing/57486507/lighted-halloween-tree-pumpkin-jack-o
along with many other Halloween items.
Friday, September 24, 2010
Just listed...
This little necklace I have been working on for quite sometime. I call it "Airship Captain's Badge of Honor. " To me it's a perfect melding of gothic, horror, neo-victorian design, and Steampunk bravado.

How to Make a Gravestone Rubbing
EDT’s Countdown to Halloween!
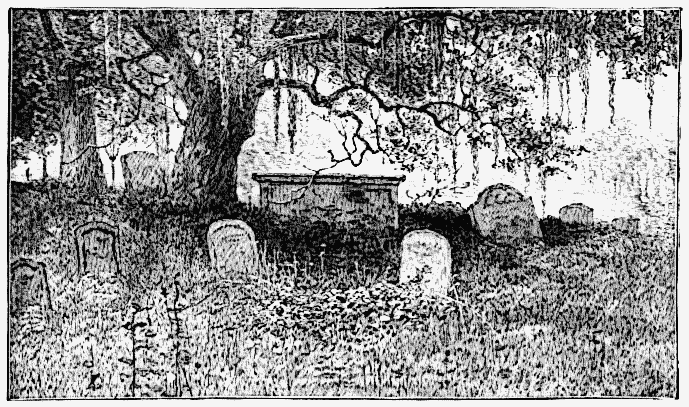
 Temple or gravestone rubbing is believed to have originated with the Chinese, around 30 0 B.C. Originally, it was used as a method of communicating governmental decrees, a forerunner to the printing press. The government’s laws and messages were carved in stone then transformed to parchment by rubbing with colored wax or other permanent dye material. More recently gravestone and momument rubbings were once very popular, and a common field trip activity for schoolchildren. For me they are just really, really cool to frame and put in your living room, especially for Halloween. There are much more complex methods for achieveing a proper gravestone rubbing, but this one makes a great image and easy to do.
Things You'll Need:
• Conte crayon, or pastel
• Drawing Pencils
• Pencil Sharpeners
• Tracing Paper
• Crayons
• Masking or Painters Tape
- Remember to always be respectful in a cemetery. Always check with the proper authorities before attempting any type of rubbing activity, regardless of whether the object is on private, or public properity. If you are going to do rubbings on actual headstones or monuments, be sure to check the laws in your state before you start. In many states, like New England, it is against the law to make rubbings on gravestones. In the UK, there are centres set up specifically for making rubbings, using replicas of the original monuments and plaques. Always best to do a little research before you start to avoid getting anyone upset.
- This method will work only on gravestones that have raised or sunken letters. If you can't feel anything when you rub your fingers across them, they won't show up on a tracing.
-Hold the tracing paper over the front of the stone or marker. You may want to use masking tape to prevent your paper from moving.
- The trick to this is finding the right drawing implement that woks best for you. Try out your technique at home first, and practice a little bit. If you're using a pencil of any kind, hold it almost horizontal against the paper as you rub. If you're using a conte crayon or pastel, rest it flat against the paper. Pressing gently, rub over the image until an outline starts to appear.
-Usually, the image will not turn out completely crisp. You might want to go back in and alter it a little bit. If you're using a pencil, you can use your kneaded rubber eraser to remove shading in small areas, and create a more distinct image. Also you can move the rubbing while you’re working on it slightly to create a 3D effect. Complete the rubbing in the basic color then move the paper slightly to one side. The next step is to go over the highlights with a contrasting color giving the image a highlight or 3-D effect.
- Roll up your rubbing carefully, and when you get home spray it with a spray fixative to make sure it is protected ( make sure to do any alteration to the image before using the fixative). And there you have it a perfectly spooky image for framing.
 Temple or gravestone rubbing is believed to have originated with the Chinese, around 30 0 B.C. Originally, it was used as a method of communicating governmental decrees, a forerunner to the printing press. The government’s laws and messages were carved in stone then transformed to parchment by rubbing with colored wax or other permanent dye material. More recently gravestone and momument rubbings were once very popular, and a common field trip activity for schoolchildren. For me they are just really, really cool to frame and put in your living room, especially for Halloween. There are much more complex methods for achieveing a proper gravestone rubbing, but this one makes a great image and easy to do.
Things You'll Need:
• Conte crayon, or pastel
• Drawing Pencils
• Pencil Sharpeners
• Tracing Paper
• Crayons
• Masking or Painters Tape
- Remember to always be respectful in a cemetery. Always check with the proper authorities before attempting any type of rubbing activity, regardless of whether
 the object is on private, or public properity. If you are going to do rubbings on actual headstones or monuments, be sure to check the laws in your state before you start. In many states, like New England, it is against the law to make rubbings on gravestones. In the UK, there are centres set up specifically for making rubbings, using replicas of the original monuments and plaques. Always best to do a little research before you start to avoid getting anyone upset.
- This method will work only on gravestones that have raised or sunken letters. If you can't feel anything when you rub your fingers across them, they won't show up on a tracing.
-Hold the tracing paper over the front of the stone or marker. You may want to use masking tape to prevent your paper from moving.

- The trick to this is finding the right drawing implement that woks best for you. Try out your technique at home first, and practice a little bit. If you're using a pencil of any kind, hold it almost horizontal against the paper as you rub. If you're using a conte crayon or pastel, rest it flat against the paper. Pressing gently, rub over the image until an outline starts to appear.
-Usually, the image will not turn out completely crisp. You might want to go back in and alter it a little bit. If you're using a pencil, you can use your kneaded rubber eraser to remove shading in small areas, and create a more distinct image. Also you can move the rubbing while you’re working on it slightly to create a 3D effect. Complete the rubbing in the basic color then move the paper slightly to one side. The next step is to go over the highlights with a contrasting color giving the image a highlight or 3-D effect.
- Roll up your rubbing carefully, and when you get home spray it with a spray fixative to make sure it is protected ( make sure to do any alteration to the image before using the fixative). And there you have it a perfectly spooky image for framing.
Thursday, September 23, 2010

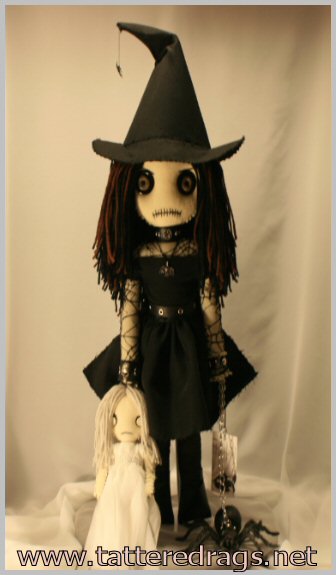
she has lost her head!


this is a new piece I have just finished for a Halloween gallery show in Boston.
She is one of 7 pieces I will be sending.

Wednesday, September 22, 2010
1/12 scale Dollhouse Miniature Haunted House Miniature Zombie Doll

This 3 1/4 inch tall doll is completely hand-sculpted and available for sale in my Etsy Store at: http://www.etsy.com/shop/tarayvonne . Perfect for the upcoming Halloween season and any graveyard or haunted house scene in 1/12 scale.
I'm under tarayvonne on Etsy and my shop name is 19th Day Miniatures. Stop in and see me. Or visit my blog at: http://19thdayminiatures.blogspot.com/
One Stop Witch Shop

This is a custom order which is sold, but you get an idea of what my work is like.

display table from the witch shop and barrels

Tuesday, September 21, 2010
New line of products for Victorian dollhouses
 Many of us are aware of the importance that Victorians gave to their mourning periods. After all, they did picnic at the cemetery and wore strands of hair of their deceased in their jewelry...
To honor Victorian mourning tradition, I hereby present the Mourning Line of Kaleidoskopic Romance. A series of white and black boxes depicting Victorian artwork and mourning objects to complete your Victorian house. More designs will appear in the future, so stay tuned. And as a special treat for Halloween time, this week's special is the box of post-mortem pics!
 A collection of real post-mortem images presented in a white and black box, loose to display as you wish. Wouldn't this add a touch of creepiness to your dollhouse or diorama? Don't let them slip by!
Friday, September 17, 2010
Tips for a Frugal Halloween Party
EDT's Count Down To Halloween!
 This weeks instalment of our countdown to Halloween is brought to you by the all powerful queen of stitches herself Static White of SWStitchery. With her amazing talent she can not only make monkeys hang from your trees, but cute little piggies fly as well. So take a listen to her most festive and frugal Halloween party tips.
Tips for a Frugal Halloween Party
I was at the local dollar store and wandering through the aisles I thought "Wow I could throw a fairly awesome Halloween party on the cheap." Not that I really am but I can pretend. So in my wanderings not only did I eyeball the Halloween decorations... Okay, I did buy a couple Halloween decorations but who can resist? Not I, said the cat. Besides I never did replace my old skeleton.
Get back on track. Right. *Ahem* so I found black paper plates, cups, plastic utensils & even napkins. There was a cutsie set with a ghost, witch & black cat but I'm not going that route (in my head anyway).

Not only will they look like serial killers (which is cool) but they sweat profusely in punishment for not dressing up. You don't need to mention that part just snicker and hand them a drink with some of these floating in them:

Skip the pumpkins and go for the skull ice cubes. Or maybe some Skull jello shots!
If you find a good dollar store they should have all sorts of other goodies right now like foam tombstones, cauldrons, skeletons, plastic goblets, etc. Hey, in this economy every dollar saved counts but that doesn't mean we can't have fun! The one I was in even had Halloween candies, lots of skull decorations, plus streamers, basic food stuffs (think ingredients) and I even saw Margarita mix!
Hmm, maybe I will have that party after all...
 Static White love's creating quality handmade items whether it's clothing, dolls, or various forms of art. Weird, wonderful, and random, her items are generally one/few of a kind. All created with an artistic eye, stitches like sutures & a wee touch of madness.
For more of custom zombie on the web you can find her at …
etsy.com/shop/SWStitchery
facebook.com/SWStitchery
StaticWhite.Blogspot.com
twitter.com/swstitchery
 This weeks instalment of our countdown to Halloween is brought to you by the all powerful queen of stitches herself Static White of SWStitchery. With her amazing talent she can not only make monkeys hang from your trees, but cute little piggies fly as well. So take a listen to her most festive and frugal Halloween party tips.
Tips for a Frugal Halloween Party
I was at the local dollar store and wandering through the aisles I thought "Wow I could throw a fairly awesome Halloween party on the cheap." Not that I really am but I can pretend. So in my wanderings not only did I eyeball the Halloween decorations... Okay, I did buy a couple Halloween decorations but who can resist? Not I, said the cat. Besides I never did replace my old skeleton.
Get back on track. Right. *Ahem* so I found black paper plates, cups, plastic utensils & even napkins. There was a cutsie set with a ghost, witch & black cat but I'm not going that route (in my head anyway).

You could leave a stack of these by the door for those that fail to dress up:

Not only will they look like serial killers (which is cool) but they sweat profusely in punishment for not dressing up. You don't need to mention that part just snicker and hand them a drink with some of these floating in them:

Skip the pumpkins and go for the skull ice cubes. Or maybe some Skull jello shots!
If you find a good dollar store they should have all sorts of other goodies right now like foam tombstones, cauldrons, skeletons, plastic goblets, etc. Hey, in this economy every dollar saved counts but that doesn't mean we can't have fun! The one I was in even had Halloween candies, lots of skull decorations, plus streamers, basic food stuffs (think ingredients) and I even saw Margarita mix!
Hmm, maybe I will have that party after all...
 Static White love's creating quality handmade items whether it's clothing, dolls, or various forms of art. Weird, wonderful, and random, her items are generally one/few of a kind. All created with an artistic eye, stitches like sutures & a wee touch of madness.
For more of custom zombie on the web you can find her at …
etsy.com/shop/SWStitchery
facebook.com/SWStitchery
StaticWhite.Blogspot.com
twitter.com/swstitchery
decapitated heads, hags, and zombies...oh my!!


 Lots of new spooky items at mealy monster land.
I had a huge shop update
20 new pieces added.
here are just a few of the new goods.
thanks for taking a peek.
Vampire Bat'eye canvas print
The first Oneyes art print 'Vampire Bat'eye' is now available at my shop on Etsy. I am really happy with the quality of the print. My original illustration is professionally printed on canvas. It is printed with archival quality ink ensuring it is fade resistant. The canvas is streched around a wooden frame and is equipped for wall hanging so all you need to do once you received it is find a good place to display it. During the coming months more will be added to the shop.

Wednesday, September 15, 2010
Tuesday, September 14, 2010
The Mini Undead!
Big undead announcement!! The mini dead are here!!
Thats right! I have now started to make mini versions of my zombie heads!!
 The great thing is that because these zombie heads are smaller in size I am able to sell them for less then what I sell the life size ones for. So for people who love the life size ones but can not afford them you now have the option of purchasing the mini ones starting at only $45 (and up if customized)!
I have added a custom listing for these on my Etsy shop here!!!
So right now if you are interested in purchasing one you can contact me through the listing on Etsy or the contact the Dead Girl Link here!!The sooner the better so if orders pick up you can have yours in time for Halloween!
Please pass on the good undead word to people you know!
SMAAAALLL BRAAAINS!!
LDG Nicole
Thats right! I have now started to make mini versions of my zombie heads!!

I have added a custom listing for these on my Etsy shop here!!!
So right now if you are interested in purchasing one you can contact me through the listing on Etsy or the contact the Dead Girl Link here!!The sooner the better so if orders pick up you can have yours in time for Halloween!
Please pass on the good undead word to people you know!
SMAAAALLL BRAAAINS!!
LDG Nicole
Monday, September 13, 2010
Oh what a tangled web we weave!
 When first, we practice to deceive! As the rest of the saying goes. How many of us still use this phrase today?
I took this very ornate black metal pendant and weaved 18 gauge wire throughout, starting with the outside and then working to the middle of the piece.
At the top of the pendant, i created my own wire bail so that i'd be able to hang some black chain from it and turn it into this intricate necklace you see before you!
Just above the bail, are 6mm round black glass beads and in the middle of those is a metal spacer and the necklace fastens with a light blue studded toggle clasp.
Necklace measures 26 inches in length.
Measurement of pendant: 4 inches in length and 4 inches in width.
Thanks for looking!
Sunday, September 12, 2010
Friday, September 10, 2010
Creepy Carnivale Banner
EDT’s Countdown to Halloween!
 This week Heather Lynn maker of the adorable Coffin Critters collection highlighted in her etsy shop Coffincritters brings us the perfect décor item for those mystical fall nights that lay ahead of us.
DIY-Creepy Carnivale Banner
Last year, I turned my hallway into a dark sideshow carnivale for Halloween. I came up with an idea for a decoration that is VERY inexpensive to make, and very easy! Because you hang it as a streamer, it also takes up a good amount of space and is a great way to border a room for that creepy circus feel!
Here is what you need:
*Paper or rigid fabric. I used construction paper because it's cheap and easy to work with. You may also use scrapbook paper, felt, etc. Primary colors work best here! Use a variety of different colors, and alternate them. You can get four triangles out of one sheet of 8.5" x 11" paper.
*Hole punch
*Scissors
*String, twine or cording. You can be creative with this! You may even use lace or corset tape for a Victorian feel! I used hemp cord.
*Thumbtacks/pushpins
*OPTIONAL: skull or skeleton ornaments, plastic spiders or bats, stamps, paint-use your imagination!


Repeat these steps on the other colors of paper you wish to use.
STEP 7: Once you have cut several pieces of the colors you want, cut the size of twine or cording that you need. Make a small loop on one end so the triangles will not slide off. Slide the triangles onto the cording to form your banner. Do an alternating pattern, or select your colors at random. Once finished, tie a small lop at the the end of the cord.
STEP 8, OPTIONAL: embellish as you wish! I hung skeleton ornaments I got from the dollar store from the cording. You may also decorate your triangles with paint, stamps, etc. Dye your paper with black tea or coffee first for a more rustic loo. Be creative and have fun!!!
STEP 9: Hang on wall, over doors or windows with thumbtacks or pushpins.
Hang one of my "Bone Juggler" prints on the wall as a perfect finishing touch! You may find them in my faerydustpixy shop.
 This week Heather Lynn maker of the adorable Coffin Critters collection highlighted in her etsy shop Coffincritters brings us the perfect décor item for those mystical fall nights that lay ahead of us.
DIY-Creepy Carnivale Banner
Last year, I turned my hallway into a dark sideshow carnivale for Halloween. I came up with an idea for a decoration that is VERY inexpensive to make, and very easy! Because you hang it as a streamer, it also takes up a good amount of space and is a great way to border a room for that creepy circus feel!
Here is what you need:
*Paper or rigid fabric. I used construction paper because it's cheap and easy to work with. You may also use scrapbook paper, felt, etc. Primary colors work best here! Use a variety of different colors, and alternate them. You can get four triangles out of one sheet of 8.5" x 11" paper.
*Hole punch
*Scissors
*String, twine or cording. You can be creative with this! You may even use lace or corset tape for a Victorian feel! I used hemp cord.
*Thumbtacks/pushpins
*OPTIONAL: skull or skeleton ornaments, plastic spiders or bats, stamps, paint-use your imagination!


S
STEP 1: Lay your first sheet of paper horizontally, and fold it in half.
STEP 2: Cut along your folded line.
STEP 3: Take one of your cut pieces and fold the corner over. Repeat on second piece.
STEP 4: Cut of excess paper and save for another project.
STEP 5: Cut along your fold to make two triangles from each piece.
STEP 6: You should now have four triangle pieces. Punch a hole in one corner of each piece.

Repeat these steps on the other colors of paper you wish to use.
STEP 7: Once you have cut several pieces of the colors you want, cut the size of twine or cording that you need. Make a small loop on one end so the triangles will not slide off. Slide the triangles onto the cording to form your banner. Do an alternating pattern, or select your colors at random. Once finished, tie a small lop at the the end of the cord.
STEP 8, OPTIONAL: embellish as you wish! I hung skeleton ornaments I got from the dollar store from the cording. You may also decorate your triangles with paint, stamps, etc. Dye your paper with black tea or coffee first for a more rustic loo. Be creative and have fun!!!

STEP 9: Hang on wall, over doors or windows with thumbtacks or pushpins.
Hang one of my "Bone Juggler" prints on the wall as a perfect finishing touch! You may find them in my faerydustpixy shop.
 Be it humorous or romantic, cute or creepy, Heather Lynn uses many types of media to try to illuminate the beauty and magic that can be found in darkness. Pretty faeries, cute zombies, and the horror of the undead all live harmoniously in her world of creation. She uses a variety of media such as: oil paint, clay, paper, digital, colored pencil and more.
For more of coffincritters on the web you can find her at …
Website: http://www.faerydustpixy.etsy.com/
Website: http://www.coffincritters.etsy.com/
Blog: http://faerydustpixy.blogspot.com/
Facebook: http://www.facebook.com/pages/edit/?id=177873799537#!/pages/GossamerHollow/177873799537
Tuesday, September 7, 2010

Saturday, September 4, 2010
September Slasher Sale BOGO!
Everything in the Slasher Sale section of my Etsy Shop for the month of September is buy one get one of equal or lesser value for free!!! Items must be in the Slasher Sale section of the shop to qualify for this deal!!!! Go get em and spread the word!!!
Also remember to please check out the Roses for Rosie Fundraiser items!! The items remaining will only be available online for the rest of September because the Buddy Walk is at the beginning of October. For more info regarding this fundraiser see my previous post here!! A HUGE thank you to those of you who have already purchased items or helped spread the word about these items!! You guys rock!!
Stay posted because the undead will be taking over my Etsy Shop very soon!!! You will definitely want to be infested by what I have in store!!
Slashed!
LDG Nicole
Friday, September 3, 2010
New Print for Halloween!!

Hello ghouls and goblins,
I have just added a special new print to my store for all those halloweenies out there! It's spooky and bloody and an early treat for Samhain.
"Black Dahlia"
5x5 print on semi-gloss paper. Professionally printed, and ready for framing.
I hope you will enjoy adding this to your spooky collection of Halloween art!
Available in my etsy store: www.JasmineWorth.etsy.com
Making Labels for Apothecary Jars
EDT's Count Down To Halloween!
 Kassandra of kaleidoskopicromance, a true master in the world of minatures, brings us this weeks installment of EDT’s countdown to Halloween. Do yourself a favor and take a look at her tiny creations. Her minature books are just amazing. They are all so detailed, and beautiful it would be hard to choose just one for your little library. And she has the sweetest little Ouija boards too.
Making labels for potion and Apothecary jars
Every year I peruse the Halloween stores to find props for my Halloween party. One of my most sought-after items is Halloween labels. Yes, we all know the kid-friendly, colorful labels that most stores carry, but if you are looking for witch potion or apothecary labels, it is unlikely that you will find them. Although Martha Stewart has come up with a formidable set of antique-looking labels, they can get you very quickly out of your party budget. So if you would like to save some bucks and have lots of fun designing you own labels, here is what you need to do.
First, decide what kind of label you would like. You can go for the “Witch Potion” look for a witch or wizard theme, or the “Antique Apothecary” look, for the mad scientist theme. Once you decide, you need the labels themselves. You can design them from scratch if you want. Here you have some templates (Adobe Photoshop woks fine with these JPEG images):


Play with fonts and colors (although your best bet is black), and re-size them to fit your needs. You may also download some pre-made labels – You will need Adobe Acrobat for these:
Vintage Apothecary Labels (courtesy of EatDrinkChic by Amy Moss)
Commercial Apothecary Labels (courtesy of JustSomethingIMade by Cathe Holden)
Blank Label templates (courtesy of SlightlyOffCenter by Jack)
And of course, you may always search the net for more templates or designs.
For the witch labels, you may rely on the classics: Eyes of Newt, Spider Hair, Lizard Legs… Or go for the “natural herbs” stuff: Hellebore, Belladonna, Deadly Nightshade, Foxglove, Wolfsbane… For the Apothecary: Arsenic, Poison, Aqua Ammonia, Powdered Alum, Sulphur, Epsom Salt, Arsenate of Lead, Hydrochloric Acid, Chloroform… The only limit is your imagination!
To make the labels seem aged, you need to dye the paper with tea. DO IT FIRST, before printing the labels! Otherwise, the ink will run when it comes in contact with the water. You may use any tea you have handy, but strong black tea works better (I personally use Irish Breakfast Tea by Twinnings).

There are two methods to dye the paper:
* First method (this one gives the paper a uniform dye): Brew the tea; let it cool and pour it into a plastic bin. Soak the paper in the tea for 1 hour. Remove it, and let it dry completely on paper towels.
* Second method: Heat a mug of water and submerge one bag of tea. Let stand 1 minute. Then take out the teabag and slide it on the paper, squishing it with a spoon (be careful, it will be hot!). Use it thoroughly over the entire surface,
except for the edges. You may refresh the bag in the brewed tea if needed. Let it dry completely – I use a clothespin to hang the paper, to allow the remaining of water to make different stain designs over it as it drips. This is my preferred method, because the tea makes stains of different intensity in the paper.
Once the paper is completely dry, you can print your labels. You may spray them with a clear sealant to protect them if you wish. Cut them out and stick them to your jars. You may use double-sided tape paper or a regular school glue stick (Elmer’s works wonders!).
For the jars, you may use any glass container or bottle you may have lying around at home; the more different they are the better to achieve the Apothecary look! If the lid is somehow quelling the effect, place a small cloth over the opening and tie around the neck with a bit of cord. Or you can purchase Apothecary jars like the ones Michael’s sells.
Filling them is also easy. For the “classic witch” look you can use plastic items (spiders, ants, bats, eyeballs…) or even candy (candy corn, gummy worms…). For the “natural herbs” you can use any spice that you have in your kitchen: basil, oregano, dried tomatoes, pepper, tea… For the “Apothecary look”, use any white powder: salt, sugar, baking soda, flour; also water – many lab solutions are clear (chloroform, acid…). You may also use food coloring to dye the water.
But hey! Who says you can’t have this awesome look all year round? Just print your labels with the name of anything that needs to be labeled (for your kitchen or your bathroom), and enjoy a bit of the Halloween season every day! Here are some extra labels for you to enjoy, courtesy of Jack and Amy Moss:
Bath Apothecary Labels
Spice Labels
Tea Labels
 Kassandra is a dark Victorian lady living in what she considers the frantic 21st (or XXI, as she prefers) century. She is married to a true Gothamite who indulges and occasionally shares her obsessions. She is a fan of decadent decoration, velvet, wax seals, quills and parchment paper, thunderstorms, Absinthe, and the macabre. When she is not crafting she spends most of her free time writing, reading gothic novels, watching classic horror movies and navigating the Internet, always in a classy, 17th-century ship with white sails (surfing? I beg your pardon?).
Website: kaleidoskopicromance.etsy.com>
Blog: kaleidoskopicromance.blogspot.com>
 Kassandra of kaleidoskopicromance, a true master in the world of minatures, brings us this weeks installment of EDT’s countdown to Halloween. Do yourself a favor and take a look at her tiny creations. Her minature books are just amazing. They are all so detailed, and beautiful it would be hard to choose just one for your little library. And she has the sweetest little Ouija boards too.
Making labels for potion and Apothecary jars
Every year I peruse the Halloween stores to find props for my Halloween party. One of my most sought-after items is Halloween labels. Yes, we all know the kid-friendly, colorful labels that most stores carry, but if you are looking for witch potion or apothecary labels, it is unlikely that you will find them. Although Martha Stewart has come up with a formidable set of antique-looking labels, they can get you very quickly out of your party budget. So if you would like to save some bucks and have lots of fun designing you own labels, here is what you need to do.
First, decide what kind of label you would like. You can go for the “Witch Potion” look for a witch or wizard theme, or the “Antique Apothecary” look, for the mad scientist theme. Once you decide, you need the labels themselves. You can design them from scratch if you want. Here you have some templates (Adobe Photoshop woks fine with these JPEG images):


Play with fonts and colors (although your best bet is black), and re-size them to fit your needs. You may also download some pre-made labels – You will need Adobe Acrobat for these:
Vintage Apothecary Labels (courtesy of EatDrinkChic by Amy Moss)
Commercial Apothecary Labels (courtesy of JustSomethingIMade by Cathe Holden)
Blank Label templates (courtesy of SlightlyOffCenter by Jack)
And of course, you may always search the net for more templates or designs.
For the witch labels, you may rely on the classics: Eyes of Newt, Spider Hair, Lizard Legs… Or go for the “natural herbs” stuff: Hellebore, Belladonna, Deadly Nightshade, Foxglove, Wolfsbane… For the Apothecary: Arsenic, Poison, Aqua Ammonia, Powdered Alum, Sulphur, Epsom Salt, Arsenate of Lead, Hydrochloric Acid, Chloroform… The only limit is your imagination!
To make the labels seem aged, you need to dye the paper with tea. DO IT FIRST, before printing the labels! Otherwise, the ink will run when it comes in contact with the water. You may use any tea you have handy, but strong black tea works better (I personally use Irish Breakfast Tea by Twinnings).

There are two methods to dye the paper:
* First method (this one gives the paper a uniform dye): Brew the tea; let it cool and pour it into a plastic bin. Soak the paper in the tea for 1 hour. Remove it, and let it dry completely on paper towels.
* Second method: Heat a mug of water and submerge one bag of tea. Let stand 1 minute. Then take out the teabag and slide it on the paper, squishing it with a spoon (be careful, it will be hot!). Use it thoroughly over the entire surface,
except for the edges. You may refresh the bag in the brewed tea if needed. Let it dry completely – I use a clothespin to hang the paper, to allow the remaining of water to make different stain designs over it as it drips. This is my preferred method, because the tea makes stains of different intensity in the paper.

Once the paper is completely dry, you can print your labels. You may spray them with a clear sealant to protect them if you wish. Cut them out and stick them to your jars. You may use double-sided tape paper or a regular school glue stick (Elmer’s works wonders!).
For the jars, you may use any glass container or bottle you may have lying around at home; the more different they are the better to achieve the Apothecary look! If the lid is somehow quelling the effect, place a small cloth over the opening and tie around the neck with a bit of cord. Or you can purchase Apothecary jars like the ones Michael’s sells.

Filling them is also easy. For the “classic witch” look you can use plastic items (spiders, ants, bats, eyeballs…) or even candy (candy corn, gummy worms…). For the “natural herbs” you can use any spice that you have in your kitchen: basil, oregano, dried tomatoes, pepper, tea… For the “Apothecary look”, use any white powder: salt, sugar, baking soda, flour; also water – many lab solutions are clear (chloroform, acid…). You may also use food coloring to dye the water.
But hey! Who says you can’t have this awesome look all year round? Just print your labels with the name of anything that needs to be labeled (for your kitchen or your bathroom), and enjoy a bit of the Halloween season every day! Here are some extra labels for you to enjoy, courtesy of Jack and Amy Moss:
Bath Apothecary Labels
Spice Labels
Tea Labels
 Kassandra is a dark Victorian lady living in what she considers the frantic 21st (or XXI, as she prefers) century. She is married to a true Gothamite who indulges and occasionally shares her obsessions. She is a fan of decadent decoration, velvet, wax seals, quills and parchment paper, thunderstorms, Absinthe, and the macabre. When she is not crafting she spends most of her free time writing, reading gothic novels, watching classic horror movies and navigating the Internet, always in a classy, 17th-century ship with white sails (surfing? I beg your pardon?).
Website: kaleidoskopicromance.etsy.com>
Blog: kaleidoskopicromance.blogspot.com>
Subscribe to:
Posts (Atom)


