Halloween is almost here. And you have decided that you will throw a party that is going to be the talk of your whole neighborhood. You have picked your costume, your decorations, and the food you will be serving. Now it’s time to let your guests know so they can come. Oh my! You need to prepare the invitations!
Sure, you can go over to Martha Stewart’s web page, or to the craft store to buy some wonderfully awesome and creepy invitations… That most people will be using as well. Or, you can make your own and stand out of the crowd. This tutorial will be best suited for darkly elegant parties, with a hint of Victorian/past eras flair, more than for kid-oriented ones. We are striving for luxurious decadence and style.
Do you remember Francis Ford Coppola’s movie “Bram Stoker’s Dracula”? While traveling by train, Jonathan Harker is reading a letter sent by the Count:
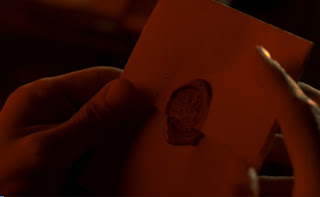
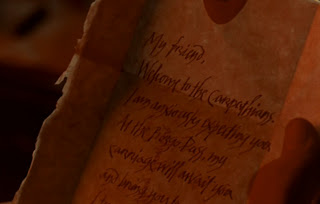
Our invitations are going to be similar to this letter.
Materials you will need:
Pic materials
- a computer and printer
- parchment paper
- scissors
- red sealing wax
- wax seal
- matches or lighter
First, buy the parchment paper. I love the Southword brand, and so did Abraham Lincoln! You have several available colors, but my favorite is gold. You can find it at most Staples stores. You’ll see that it has an amazing feeling to the touch, just like real hemp parchment. You won’t be using the whole lot for the set of invitations, but it’s an awesome paper to have for other projects (Harry Potter, anyone?) or to send letters.
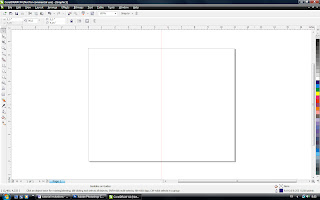
Go to your computer and open a program to work with text. My favorite to use is Corel Draw, especially because we may add graphics later on. Adobe Illustrator may work as well. If you use Corel:
* open a new document
* choose the option “Landscape”
* we will use one page to make two invitations, so mark it in a way that you know how much space you can use – draw a line dividing it by half.
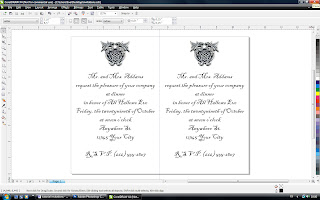
* Write your text. Try to use formal or semi-formal language, such as “You are cordially invited”, or “Mr and Mrs. (insert your last name) request the honor of your presence”. Don’t forget to include the date and place for the party. For the RSVP, I personally would include only a contact telephone. Telephones existed in the 19 century, but not e-mail, and we are going for antique feeling here. However, that is up to you.
* Choose a font that looks like hand writing. If you do not have one, just google “handwriting font” and you’ll find a bunch of them. I am very fond of Blackadder ITC. Adjust the size.
* Copy the text in the second half of the page. Click Arrange -> Align and distribute -> Align top.
* Center both texts to the page.
* Optional. You may want to add a crest or personal image to your invitations. A Celtic knot, a rampaging lion… Try not to use spiders, bats, ghosts or the typical Halloween imagery. We are going for the “Coat of Arms” look. As always, Google is your friend. Choose your image and save it as a JPG. Then click the Import button, and insert your image on the invitations. Adjust the image size and its position to the text.
* Click File -> Print. A picture should come up saying: “Printer paper orientation does not match one or more document pages. Adjust printer automatically?” Click Yes. Click Print. You may want to do it first on a regular paper just to make sure everything is correct. Print as many invitations as you need.
Cut the page in half following the line you made.
Fold it in a way that there is no text showing. I like the method 1 better, but the method 2 is the same as to how Jonathan’s letter is fold:
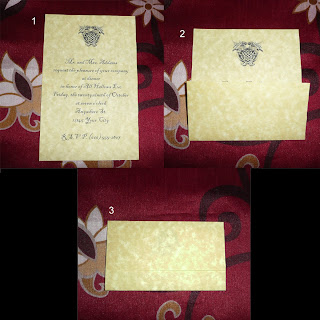
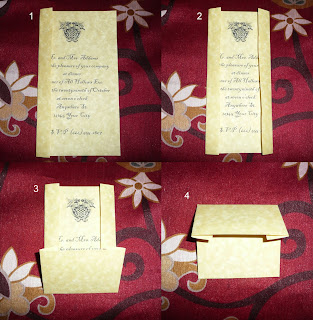
Then, get ready for the seals!

Next you will need sealing wax. You may buy it online, but they usually carry it at Michael’s stores in several colors (white, silver, gold…). My favorite is, of course, red, and goes perfectly well with this tutorial theme. To stamp the wax, you also need a wax seal. Also available at Michael’s, you have every letter of the alphabet to choose from, or you can pick a generic image. You have a wide selection of seals at Nostalgic Impressions.
*Disclaimer*
Be very careful during these steps! Be aware of risk of fire. Wax and papers can burn, and we would end up with a disaster instead of a nice party. Have someone nearby to help you, and a fire extinguisher just in case. Children should not use matches or lighters. You may want to try doing seals on regular paper a few times before doing it on your invitations.
Light the wick of a sealing wax stick and let the melting wax drip over your closed invitation. Be patient. It can take a little while for a good amount of wax to form on the paper. Blow out the flame when you have enough wax on your invitation, and put the stick aside on a non-flammable surface. Let the wax cool for a few seconds and stamp it with the wax seal. Wait 2-3 seconds before lifting it up. Let it cool. Repeat these steps for each invitation, one at a time.
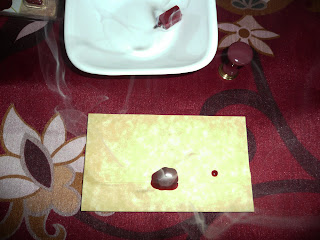
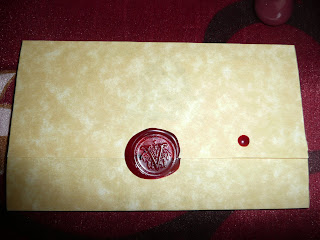
You can see a drip fell out of place, but personally it does not bother me; I honestly think that this add to the character of the invitation. Extra drops were likely to happen in antique documents. However, you just need to be extra careful when blowing out the flame on the wax stick or when you handle it to avoid this.
Optional. If you would rather not use fire, there are available stickers that look like wax seals. You can buy those instead, but be advised that these tend to be more expensive.
Deliver proudly your invitations and watch the surprised face of your guests. Surely they have never received such an invitation! You may do it in person, or use the also available parchment envelopes. If using the envelopes, place your wax seal outside, sealing the letter, instead of on the invitation.
Have fun at your party!
 Kaleidoskopic Romance is a team of husband and wife and this is our little art project. We have always been fascinated with all things macabre, dark and unusual, especially Romantic Era writers as well as vampires and other night hounds. What we like most is to take an ordinary object and “gothificate” it.
For more of kaleidoskopicromance you can find them at...
Shop: kaleidoskopicromance.etsy.com
Blog: kaleidoskopicromance.blogspot.com



2 comments:
Thanks a lot for these inspirations for the Elegant Halloween Party Invitations. I am just in love with these details because I had used your idea for my family Halloween bash that I had hosted at the vintage inspired event venue in Los Angeles. The food was also having so much creativity as per our theme and it was very tasty too.
مكنسة تنظيف سجاد
شركات تنظيف سجاد
Post a Comment